How to Install a Home Cedar Sauna: 2026 DIY Guide
Table of Contents
- What You'll Need Before You Start
- Step 1: Site Prep, Foundation, and Permits
- Step 2: Sauna Electrical Requirements 220V and Heater Wiring
- Step 3: Insulation, Vapor Barrier, and Cedar Paneling
- Step 4: Sauna Ventilation Best Practices for Airflow
- Step 5: Benches, Heater Placement, and Safety Guards
- Cedar Sauna Maintenance Tips for the First Year
- Common Installation Mistakes and How to Avoid Them
- Frequently Asked Questions
Last Updated: September 25, 2026
What You'll Need Before You Start
A how to install home cedar sauna project is manageable for a confident DIYer, but prep decides whether it goes smoothly or stalls.

- Confirm your electrical panel can take a 240-volt circuit
- Decide indoor or outdoor placement
- Call your local building department about permits
- Measure door clearance and ceiling height
- Set a realistic budget with a 15% buffer
- Pick your heater size before you frame anything
Tools, Materials, and Skill Level
Skill level: Intermediate. If you've framed a wall or hung drywall, you can handle this.
Tools you'll need:
- Circular saw and miter saw
- Cordless drill and impact driver
- Level, framing square, and tape measure
- Staple gun for the vapor barrier
- Wire strippers and a voltage tester
Materials:
- Kiln-dried framing lumber
- Foil-faced insulation
- Cedar tongue and groove paneling
- Vapor barrier with foil facing
- Sauna heater and controls
- Cedar benches and safety guards
Step 1: Site Prep, Foundation, and Permits
Site prep is where a sauna build is won or lost: a level, dry base keeps framing square and cedar from warping.
Do You Need a Permit for a Home Cedar Sauna?
Yes, in most cases. A permanent sauna structure usually requires a building permit, and the electrical work almost always requires a separate electrical permit.
Step 2: Sauna Electrical Requirements 220V and Heater Wiring
Sauna electrical requirements 220v are non-negotiable for most residential heaters, and this is where DIY builds stall. A typical heater draws significant amperage, requiring a dedicated 240-volt circuit in appropriate gauge wire, never a shared circuit or extension of an existing run.
Sizing the Circuit: The Math You Need Before You Buy Wire
Start with the heater's nameplate rating. A 6 kW heater at 240 volts draws 25 amps, an 8 kW roughly 33 amps, and a 9 kW about 37.5 amps, these numbers drive everything downstream.
- 6 kW heater (25A): 25 × 1.25 = 31.25A → requires a 40-amp breaker and 8-gauge copper wire
- 8 kW heater (33A): 33 × 1.25 = 41.25A → requires a 50-amp breaker and 6-gauge copper wire
- 9 kW heater (37.5A): 37.5 × 1.25 = 46.9A → requires a 50-amp breaker and 6-gauge copper wire
What the Circuit Must Include
- A dedicated double-pole breaker in your panel, no sharing with other loads
- Correct wire gauge for the heater's rated draw and run length (see above)
- A disconnect switch within sight of the heater, per NEC 422.31
- GFCI protection where your local code requires it, many jurisdictions now require GFCI for sauna circuits
- All wiring inside electrical conduit where exposed, and all connections in rated junction boxes
The Permit and Inspection Angle Most Guides Skip
Electrical work in a sauna is not a gray area. Most jurisdictions require a separate electrical permit for a new 240-volt circuit, and the work typically must be performed by a licensed electrician or inspected by the local authority having jurisdiction (AHJ).
Before you buy a single foot of wire:
- Call your local building department and ask whether a homeowner can pull an electrical permit for a sauna circuit
- Ask what inspections are required, rough-in, final, or both
- Confirm whether GFCI is required in your jurisdiction
- Get the permit number before work begins
Heater Controls and Smart Integration
Modern heaters increasingly support Wi-Fi controls and app monitoring. Plan for it before the walls close. You'll need a control circuit from the heater to the panel location, a dedicated power source for the control module if it isn't powered by the heater circuit, and a neutral wire if the controller requires 120V. Run conduit for low-voltage control wiring alongside the power circuit, adding it later means opening finished walls.
Step 3: Insulation, Vapor Barrier, and Cedar Paneling
Insulation and vapor barrier work together to hold heat in and keep moisture out of the wall cavity. Get the order wrong and you'll trap moisture where it causes rot.
Insulation: R-Values and Material Choices
Use foil-faced rigid foam or foil-faced mineral wool batts. The foil reflects radiant heat back into the room and acts as the vapor barrier when seams are taped.
Recommended R-values by climate:
- Mild climates (Zone 1-2): R-13 in walls, R-19 in ceiling
- Moderate climates (Zone 3-4): R-15 in walls, R-30 in ceiling
- Cold climates (Zone 5-7): R-21 in walls, R-38 in ceiling
The Vapor Barrier: Foil Facing and Seam Sealing
The vapor barrier is the most critical, and most commonly botched, layer. The rule is absolute: foil facing always points into the room. The interior is hot and humid, the exterior cooler and drier, and vapor drives hot to cold, inside to outside. Face it the wrong way and moisture condenses in the cavity, unnoticed until the wood rots.
Installation sequence:
- Frame and rough-in the electrical
- Install foil-faced insulation between studs, foil facing into the room
- Seal all seams with foil tape, every seam, every penetration
- Install the vapor barrier with the foil facing into the room (if using a separate barrier)
- Nail up cedar tongue and groove paneling
Thermal Bridging: The Hidden Heat Loss
Every stud touching both cold exterior and warm interior wicks heat straight out. That's thermal bridging, and in a small sauna it accounts for a meaningful share of heat loss.
Indoor Cedar Sauna Designed for Premium →
Mitigation strategies:
- Use foil-faced insulation with taped seams to create a continuous reflective surface
- Consider rigid foam sheathing on the exterior if you're building from scratch
- Seal all framing penetrations with foil tape or caulk rated for high temperatures
- Avoid metal fasteners that penetrate the vapor barrier without sealing
Cedar Paneling: Grades, Profiles, and Installation
Cedar is the traditional choice for sauna interiors because it resists moisture, decay, and warping. But not all cedar is equal.
Grades:
- Clear grade: No knots, uniform color, highest cost. Purely aesthetic, performs the same as knotty grades.
- Knotty grade: Visible knots, more character, lower cost. Knots can bleed sap in high heat, so some builders avoid them near the heater.
- Select tight knot: A middle ground, tight knots that won't bleed, moderate cost.
Profiles:
- Tongue and groove (T&G): The standard for sauna walls and ceilings. Provides a tight, smooth surface.
- Shiplap: Overlaps for a rustic look, but less moisture-tight than T&G.
- Beadboard: Decorative, but the grooves can trap moisture.
Installation tips:
- Use stainless steel or galvanized nails to avoid rust stains
- Leave a 1/8-inch expansion gap at the edges, cedar moves as it heats and cools
- Nail through the tongue, not the face, to hide fasteners
- Pre-drill near board ends to prevent splitting
- Acclimate the cedar to the room for 48-72 hours before installation
Step 4: Sauna Ventilation Best Practices for Airflow
Sauna ventilation best practices come down to one rule: fresh air in low, stale air out high. Place the intake vent near the heater, low on the wall, and the exhaust on the opposite wall near the ceiling, that layout creates a natural convection loop as hot air rises. Add adjustable vents to tune airflow: too much kills heat retention, too little leaves the room stuffy.
Step 5: Benches, Heater Placement, and Safety Guards
Bench height determines comfort more than any other dimension. The upper bench should sit high enough that your feet rest above the heater's stones, out of the hottest zone.
Heater placement rules:
- Keep the heater clear of combustible surfaces per the manufacturer's clearance specs
- Never install it directly under a bench
- Leave room for air to move around the unit
- Mount safety guards around the heater for anyone sharing the space
Cedar Sauna Maintenance Tips for the First Year
Cedar sauna maintenance tips matter most in year one, when you learn how your specific build behaves.
Your first-year routine:
- After every session: Wipe benches and the glass door
- Weekly: Sweep or vacuum the floor panels
- Monthly: Check vent settings and adjust for the season
- Seasonally: Inspect the heater, wiring, and wood condition
Watch for these warning signs:
- Dark patches on the ceiling near the heater
- Soft spots in the bench wood
- Rust on heater components
- Gaps opening between tongue and groove boards
Address each one early. Small fixes stay small.
Common Installation Mistakes and How to Avoid Them
The same handful of errors sink most DIY sauna builds. Here's how to dodge them.
Frequently Asked Questions
Do you need a 220 line for a cedar sauna?
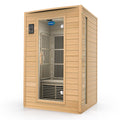
Almost every residential cedar sauna heater runs on 240-volt service, which most people call a 220 line. A typical 6.5 kW heater like the one in the AuroraTherm Cedar Indoor Sauna needs a dedicated 240-volt circuit on a 30-amp breaker with 10-gauge copper wire. It must be on a GFCI breaker, and the run should be in conduit if it passes through a wall. A licensed electrician should pull the circuit and confirm your panel has the spare capacity before you frame anything.
What is the 200 rule for sauna ventilation?
The 200 rule means the intake vent sits low near the heater, about 200 mm (roughly 8 inches) above the floor, while the exhaust vent sits high on the opposite wall, around 200 mm below the ceiling. That spacing creates a natural convection loop: cool air enters low, passes over the heater, and exits high. Without it, the room feels stuffy and the heater works harder. Pair it with a mechanical exhaust fan if your sauna sits in a basement or a tightly sealed room.
Can I install a cedar sauna in a basement or garage?
Yes, both work well if you handle moisture and drainage first. In a basement, lay a subfloor with a vapor barrier over the concrete and give the room a floor drain or a sloped, moisture-resistant surface. In a garage, insulate the walls and ceiling to hold heat, and run your 240-volt circuit from the main panel. Keep the intake and exhaust vents clear, and leave at least 2 inches of clearance behind the heater for air circulation.
Is it better to build a sauna from scratch or use a pre-cut kit?
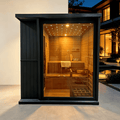
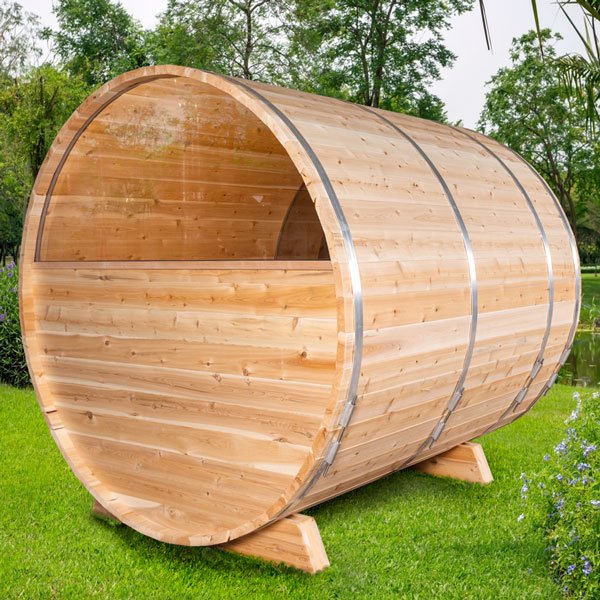
A pre-cut kit removes the hardest parts: panel fitting, bench joinery, and door alignment. The Blisspod Prague barrel sauna, for example, arrives as a prefabricated kit that assembles in a day and can be relocated later. Building from scratch gives you exact dimensions for an odd space and lets you choose every material. If you want a cedar sauna installed and running in a weekend, a kit is the faster path. If your room has unusual angles, framing it yourself usually wins.